Electrofusion Jointing Guide
Electrofusion Jointing Guide-Tips for systematic preparation for successful electrofusion jointing
Know your stuff
Get the right training and industry accreditation. A methodical approach in the preparation and installation of electrofusion systems will make
the process so simple each time.
Use the right stuff
Start with the right tools and equipment to reduce the possibility of error.
Shape it
Ensure correct alignment into the coupler by cutting the pipe ends straight and if required. Use a correctly sized manual clamping tool to push any ovalised end to reshape within the ovalisation range required
by Australian standards.
Scrape it
Remove the oxidised layer on the pipe with a well fitted, high quality scraping tool to maintain a constant thickness of scrape to the exact length
of the electrofusion coupler being used.
Clamp it
Clamp the pipe for alignment, restraining and re-rounding. The correct sized clamps will keep everything tight and straight and give you the added assurance that the pipe will not move during the scraping and fusion process.
Keep it clean
Use a ground cover, shelter and pipe end covers where possible. Ensure a clean surface prior to inserting the pipe into the fitting. Wipe the surface with an Isopropanol wipe to remove any residue, then allow to dry without adding any further contamination. Keep electrofusion fittings in the bag until weld time to avoid the exterior surface re-oxidisation.
Time it right
Start the electrofusion jointing process at a time you can guarantee no interruption.
Cool it
Follow the instructions of the machine strictly and allow the adequate time for heating and cooling. Ensure the fusion indicators have risen. Do NOT remove the clamps from the fitting until the cooling time has elapsed.
Trace it
Mark the joint with the the date and number issued from the Electrofusion control box.
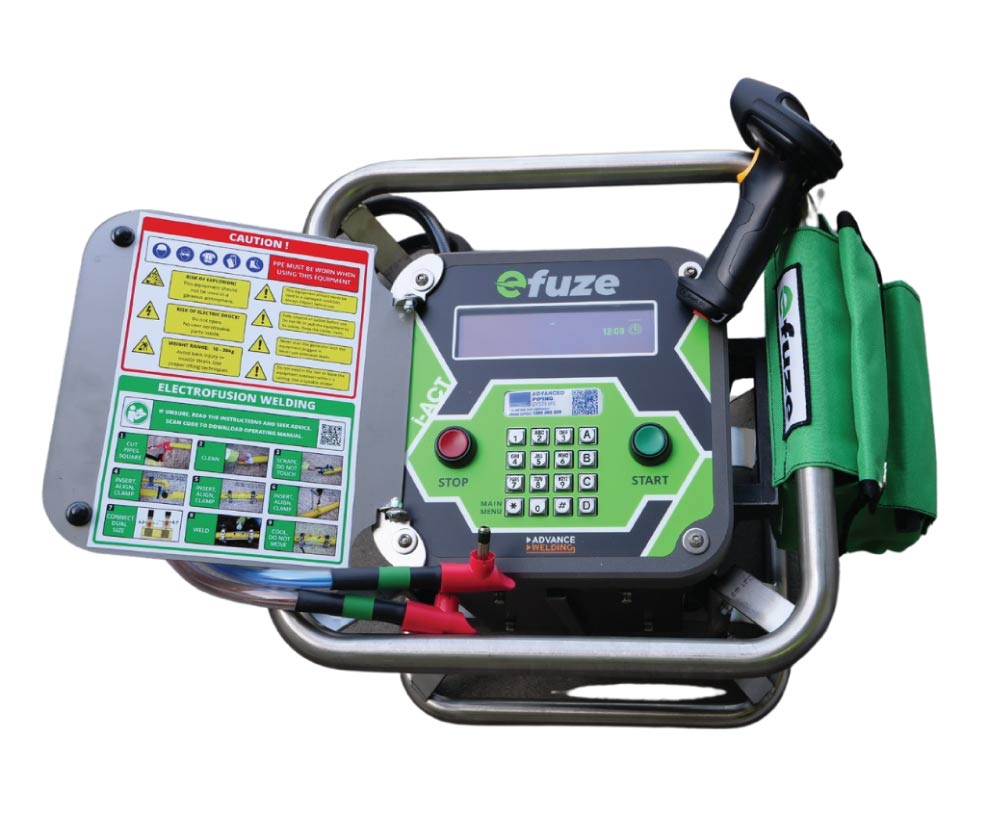
Electrofusion Control Units and Jointing
- Control units should operate with barcode marked fittings according to ISO 13950, with a maximum output of 48 Volts and should include safety devices to prevent voltages greater than recommended by the manufacturer.
- The safety device should operate in less than 0.5 sec.
- The user should check the suitability of the control unit for use with the fitting supplier.
- For a remote power source, invertor generators are recommended for use with all electronic electrofusion welders – available to purchase or hire from Advanced Piping.
(Ref: PIPA Recommendations for Electrofusion Welding Specifications)
Electrofusion Fitting Barcode
The barcode has 24 numbers in it, most of which can be interpreted
by using an industry wide method. This may vary slightly from each
manufacturer but generally the numbers represent:

1 – 8 Manufacturers mark
9 – 11 Dimensions e.g. 63mm
13-14 Fusion current in voltage
16-18 Electrical resistance in OHM
19-21 Fusion time in seconds
CT Cooling Time
General Information EO&E. Users should follow manufacturer and machine
instructions at all times